If you're going to take pictures of tiny things, you need a tiny place to take their picture, right? It seems like lately my subjects have been getting smaller than usual. Instead of 6" action figures, I've been enjoying photographing 28-32mm miniature models (roughly 1.1-1.3"). Perspective is hard enough to get right at 6", but when you shrink down to miniature size, things get... difficult.
Which I why I build my own sets. I've done a post about miniature sets before, but it was more of a "Hey, here is one little prop" instead of a complete scene. This time, I'd like to show off a cave/stone set for miniatures.
First, the materials:
5" x 5" Canvas Panels (x3)
Spackle
Superglue
Acrylic Paint
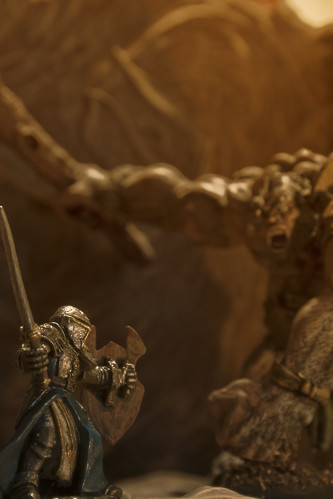
Just a quick note before we get any further. The miniatures in today's shot are Sir Titus and a Hill Giant. Both are pewter wargaming miniatures produced by Reaper Miniatures. Ok, back on topic.
Assemble three of the canvas panels into a floor and two walls, then put the spackle down to create a texture. Give it plenty of time to dry (best to let it sit overnight), and then you can get to painting. I painted mine in browns and grays. Once the whole thing is dry and you're happy with how it looks, set your models on the set, get your lighting where you want it, and start snapping away. Here is what mine looks like, completed and ready to go:
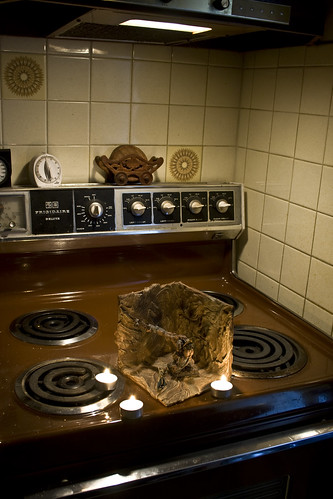
Tiny, right?
Well, here is what that tiny little set and tiny little models looks like through the camera:
Be good,
-Dave
If you're not blind and deaf, how can we pollute your head?
|


Since the weather is still in the low teens outside, I thought I'd take this opportunity to do a fun little tutorial. This one isn't so much about any photographic techniques, but instead I wanted to go into making sets for either your toys or any miniatures you have.
Today (well, last night actually) I built this bit of wall out of things sitting around the house. For this project you will need a few simple things.
Tools:
- Hot Glue Gun
- Acrylic Paints
- Paintbrushes
- Exacto Knife
Materials:
- Popsicle Sticks
- Thick, Sturdy Plastic
- Cardboard
- Little Metal Scrapbook Things*
- Flock
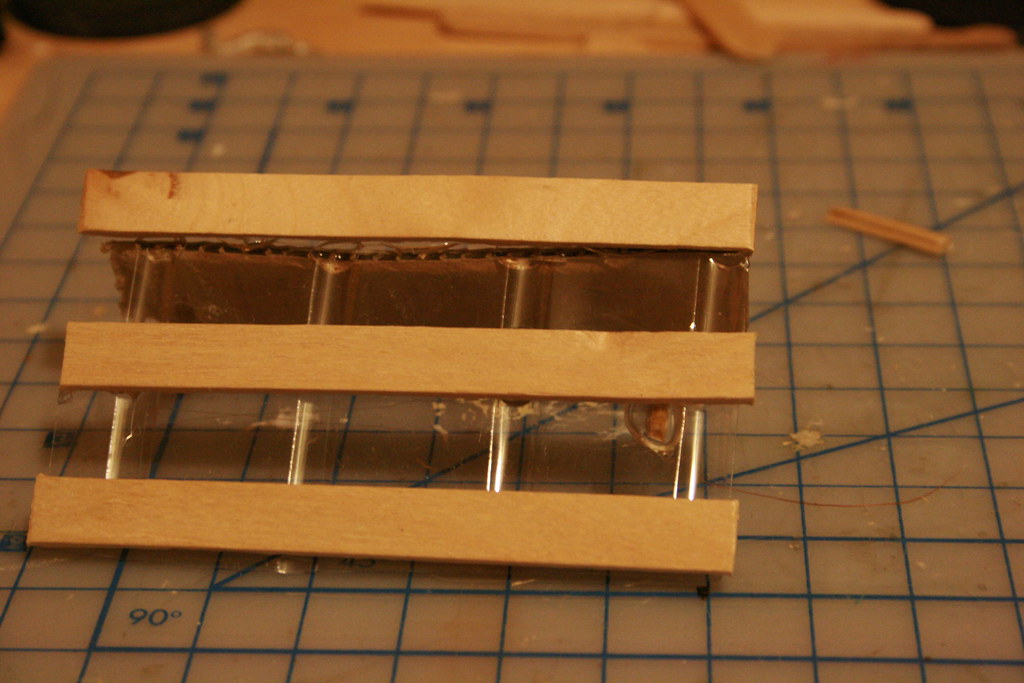
To start, measure out how large you want your wall to be, then cut the plastic to form the base (I used plastic from a toy package) that your wall will stand on. If the plastic is wobbly, use the popsicle sticks to strengthen it.
Next, cut the cardboard to make your wall. For this, I used the inside "handle" of a box as it was the right size and the corner was torn, giving it a cool worn look. Cut up another popsicle stick and use the pieces to prop the wall up. Using your exacto knife, make small, even incisions in the cardboard and slide your Little Metal Scrapbook Things inside to make cool rivets.
By now your hot glue gun is heated up and ready to go. Assemble the pieces and glue them together, taking care not to burn your fingers like I often do.
When everything is assembled, it looks something like this.
")
")
")
Before we paint it, I like to give it a coat of primer to help the paint stick. Any can of spraypaint that says Primer will do.
")
")
With paint (I didn't paint the back. Shhh!):
")
Once you get it painted, you'll need to add some flock to the base. What this means is adding some material to help create the illusion of solid ground. Most people use sand, but here I have a mixture of cinnamon, sugar, and red pepper flakes. Normally it isn't a good idea to use organic materials as flock, but I've added a nice thick coat of aerosol sealer to keep anything from rotting.
")
Safety note. Kids, cinnamon and red pepper powder can feel like a near lethal combination when inhaled. Even a little bit is going to really hurt. My nose is still runny!
So now you've assembled, painted, flocked, and sealed your wall. Now what?
PICTURES!
")
")
Be good,
-Dave
*I have been informed by my lovely assistant April that the Little Metal Scrapbook Things are called Brads and can be found in most craft/scrapbooking stores.
|
")
")
")
")
")
")
")
")
")

