6:39 AM by
El Dave
, under

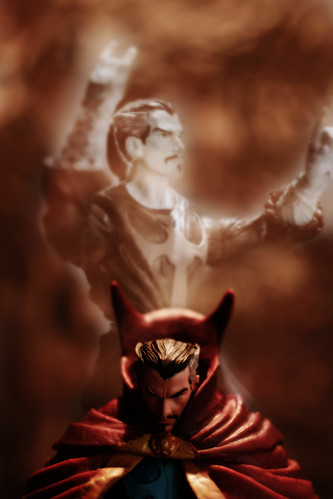
I was given the request to take a picture of Dr. Strange (among others) by TheFreakyTiki on the Comic Geek Speak Forums. I've shot the good doctor before, but I wanted to see if I couldn't bring something new to the party. Everything from lightning to light orbs to the Crimson Bands of Cyttorak were attempted and abandoned. I love Dr. Strange, but that GIANT cape really limited his posability. I tried reposing him to match various comic covers. I tried posing him to imitate comic panels. I tried action shots. I tried quiet shots.
What I think turned out the best is Dr. Strange slipping out of his body via Astral Projection. To create the effect, I had to shoot Doc in the two different poses, then overlay/layer mask the Astral Form on top of the sleeping Physical Form. A little desaturation of the Astral and a little oversaturation on the Physical helped to separate the two a little further. Save As, upload to Flickr, post on the Comic Forums.
The Alchemist of EXIF:
| Camera: | Canon EOS Digital Rebel XTi |
| Exposure: | 0.4 sec (2/5) |
| Aperture: | f/2.5 |
| Focal Length: | 50 mm |
| ISO Speed: | 100 |
| Exposure Bias: | 0/3 EV |
| Flash: | Flash did not fire |
| Orientation: | Horizontal (normal) |
| X-Resolution: | 72 dpi |
| Y-Resolution: | 72 dpi |
| Software: | Adobe Photoshop CS3 Windows |
| Date and Time: | 2008:03:23 12:46:41 |
| YCbCr Positioning: | Co-Sited |
| Exposure Program: | Shutter priority |
| Date and Time (Original): | 2008:03:23 12:18:00 |
| Date and Time (Digitized): | 2008:03:23 12:18:00 |
| Shutter Speed: | 86634/65536 |
| Metering Mode: | Pattern |
| Color Space: | sRGB |
| Focal Plane X-Resolution: | 4433.295 dpi |
| Focal Plane Y-Resolution: | 4453.608 dpi |
| White Balance: | Manual |
| Compression: | JPEG |
| Image Width: | 2592 pixels |
| Image Height: | 3888 pixels |
Be good,
-Dave
|


5:03 AM by
El Dave
, under

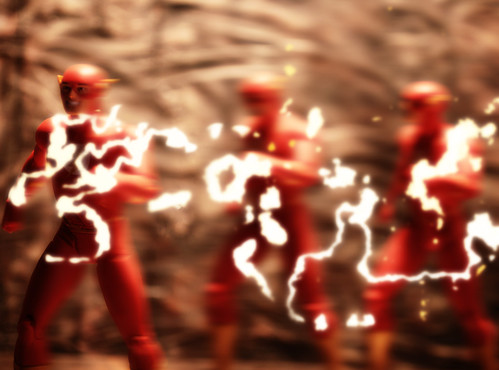
There are two things I don't do well as a photographer; motion and multiple characters. When it came time to shoot The Flash I decided to do both, and you know what? It isn't as horrible as I thought it might be. In fact, I'm actually pretty proud of it.
For those unfamiliar with The Flash and Barry Allen in general, here's a little Wiki-based refresher.
Barry Allen is a police scientist (his job title was changed to a forensic scientist in the Iron Heights one-shot) with a reputation for being very slow, deliberate, and frequently late, which frustrates his fiancee, Iris West. One night, as he is preparing to leave work, a lightning bolt shatters a case full of chemicals and spills them all over Allen. As a result, Allen finds that he can run extremely fast and has matching reflexes. He dons a set of red tights sporting a lightning bolt, dubs himself the Flash (after his childhood hero in the comic books, Jay Garrick), and becomes a crimefighter of Central City. In his civilian identity, he stores the costume in his ring, which can eject the compressed clothing when Allen needs it and suck it back in with the aid of a special gas that shrinks the suit. In addition, Allen invented the cosmic treadmill, a device that allowed for precise time-travel and was used in many stories. Allen was so well liked that nearly all speedsters that come after him are constantly compared to him. Batman once said "Barry is the kind of man that I would've hoped to become if my parents hadn't been murdered".
Setup was a little tricky. I had to take three shots of Barry, with the focus set on a single point so the other two "Barry's" would be naturally blurred. Every time I kicked the tripod I had to start all over again. All the hard work was done in Photoshop using motion blurs, difference clouds (for the lightning). Next time I'll have to find out to add the red streaks as he runs by. I also want to work out a way to have him running across water.
Oh well, something to think about.
The Silver Age EXIF:
| Camera: | Canon EOS Digital Rebel XTi |
| Exposure: | 0.6 sec (3/5) |
| Aperture: | f/2.5 |
| Focal Length: | 50 mm |
| ISO Speed: | 100 |
| Exposure Bias: | 0/3 EV |
| Flash: | Flash did not fire |
| Orientation: | Horizontal (normal) |
| X-Resolution: | 72 dpi |
| Y-Resolution: | 72 dpi |
| Software: | Adobe Photoshop CS3 Windows |
| Date and Time: | 2008:03:14 12:17:59 |
| YCbCr Positioning: | Co-Sited |
| Exposure Program: | Normal |
| Date and Time (Original): | 2008:03:14 11:08:36 |
| Date and Time (Digitized): | 2008:03:14 11:08:36 |
| Shutter Speed: | 48298/65536 |
| Metering Mode: | Pattern |
| Color Space: | sRGB |
| Focal Plane X-Resolution: | 2207.526 dpi |
| Focal Plane Y-Resolution: | 2213.058 dpi |
| White Balance: | Manual |
| Compression: | JPEG |
| Image Width: | 1739 pixels |
| Image Height: | 1288 pixels |
Be good,
-Dave
|


6:52 AM by
El Dave
, under

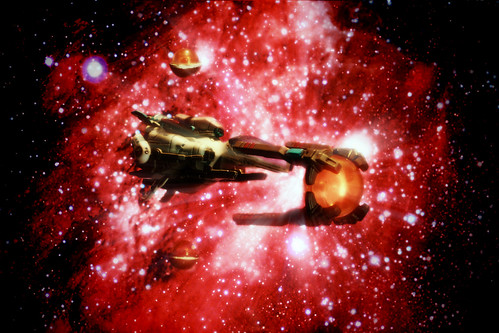
The R-Type fighter arrived late last week from Wolf Airbase in an undisclosed location in New Mexico. If you have never played R-Type, Wikipedia has an excellent summary of why I love/hate it so much:
The original R·Type was well-received by most gaming critics. However, it was also infamous for its relentless difficulty. It earned 7th place in IGN's Top 10 most difficult games to beat. The gameplay of R·Type is noticeably distinct among shoot 'em ups. Invariably the player will lose, not because of an inequality in firepower, but because of the design of the levels themselves. There is usually a 'correct' way to get through a level, but players must learn these by experience - ie. by losing and restarting from earlier in the level.
Had I been a smarter kid and simply walked away from the game, there's no telling what riches I may have today. I might even have enough to just buy my own arcade cabinet (soon my precious, soon). No matter how insanely difficult the levels were, I loved R-Type. To this day I love R-Type.
I am a fool.
The setup for this shot couldn't be more simple. Grab a fitting picture of a nebula (outer space in general is pretty) and pose the fighter in front. Open the F-Stop all the way up to F22 so we're sure to get the ship and the background in focus, and hit the shutter. Import the file to Photoshop and reopen the space backdrop as a new Layer. Move the image with the R-Type to the top Layer and add a Layer Mask. From there all you have to do is paint over the plastic stand and viola! Instant quarter grabbing goodness.
I'm the last EXIF Fighter.
| Camera: | Canon EOS Digital Rebel XTi |
| Exposure: | 15 sec (15) |
| Aperture: | f/22 |
| Focal Length: | 50 mm |
| ISO Speed: | 100 |
| Exposure Bias: | 0/3 EV |
| Flash: | Flash did not fire |
| Orientation: | Horizontal (normal) |
| X-Resolution: | 72 dpi |
| Y-Resolution: | 72 dpi |
| Software: | Adobe Photoshop CS3 Windows |
| Date and Time: | 2008:03:24 12:17:58 |
| YCbCr Positioning: | Co-Sited |
| Exposure Program: | Aperture priority |
| Date and Time (Original): | 2008:03:24 08:57:39 |
| Date and Time (Digitized): | 2008:03:24 08:57:39 |
| Shutter Speed: | -256041/65536 |
| Metering Mode: | Pattern |
| Color Space: | sRGB |
| Focal Plane X-Resolution: | 4433.295 dpi |
| Focal Plane Y-Resolution: | 4453.608 dpi |
| White Balance: | Manual |
| Compression: | JPEG |
| Image Width: | 3888 pixels |
| Image Height: | 2592 pixels |
Be good,
-Dave
|


5:06 PM by
El Dave
, under

Unfortunately, I'm not really up to an in-depth blog post. The flu has invaded our apartment and I am too busy fighting hordes of ravenous viral contagions. I have a pretty decent Flash picture ready to go, and will get that posted in a few days.
I'm dosing up on Vitamin EXIF:
| Camera: | Fujifilm FinePixS2Pro |
| Exposure: | 0.25 sec (1/4) |
| Aperture: | f/3.3 |
| Focal Length: | 50 mm |
| ISO Speed: | 100 |
| Exposure Bias: | 0/100 EV |
| Orientation: | Horizontal (normal) |
| X-Resolution: | 72 dpi |
| Y-Resolution: | 72 dpi |
| Software: | Adobe Photoshop CS3 Windows |
| Date and Time: | 2008:03:14 18:56:19 |
| Timezone Offset: | -5, -5 |
| Exposure Program: | Manual |
| Date and Time (Original): | 2008:03:14 17:34:45 |
| Date and Time (Digitized): | 2008:03:14 17:34:45 |
| Shutter Speed: | 2/1 |
| Brightness: | -50/100 |
| Metering Mode: | Center Weighted Average |
| Light Source: | Daylight |
| Color Space: | Uncalibrated |
| Focal Plane X-Resolution: | 630 dpc |
| Focal Plane Y-Resolution: | 630 dpc |
| Sensing Method: | One-chip colour area sensor |
| Exposure Mode: | Manual |
| White Balance: | Manual |
| Focal Length In 35mm Film: | 75 |
| Saturation: | High saturation |
| Compression: | JPEG |
| Image Width: | 3024 pixels |
| Image Height: | 2024 pixels |
Be good,
-Dave
|


6:49 AM by
El Dave
, under

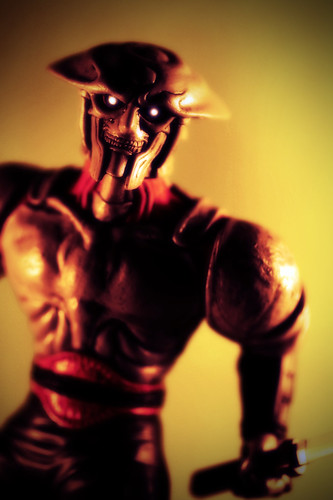
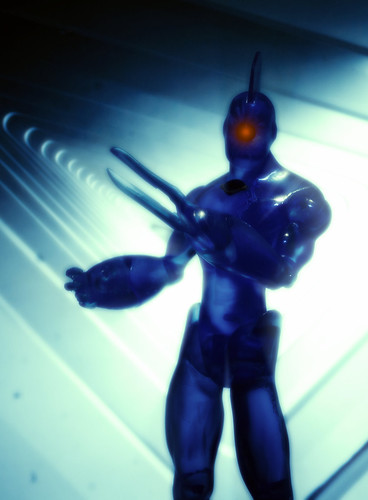
Last weekend we went back to Quake's Collectibles and I found two more Tekken characters, Heihachi and True Ogre. Of course I didn't see True Ogre until we were leaving and I'd already spent all my money, but I did manage to pick up Heihachi (slightly used).
So why am I taking pictures of Yoshimitsu then? It's not that Heihachi's a bad figure, quite the opposite. I think a fresh coat of paint (especially for his waxy looking skin) will do him wonders. He may need a new left fist as well. Gotta look into that. And I need to get back to Quake's for the True Ogre. Hopefully it's still there!
One more thing before I go into the shot details. April? I totally kick your butt at Tekken.
Ok, for this one I wanted to play with something that I've never played with before. Something I always pass by on my way to other tools. Something called a Gradient Map.
What it does is, instead of overlaying a gradient over the entire image, it auto selects the highlights and shadows and uses that as the basis for the gradient. It will take a little tweaking to get the hang of it, but I think it could be very useful for adding contrast and color at the same time. After that, I did the usual photo filters (to help smooth out the color), gaussian blur and vignette (Lens correction) that I always do. The last step was to take a soft brush and dot his eyes to make them glow.
I shall assist your EXIF!
| Camera: | Canon EOS Digital Rebel XTi |
| Exposure: | 0.02 sec (1/50) |
| Aperture: | f/2.8 |
| Focal Length: | 50 mm |
| ISO Speed: | 100 |
| Exposure Bias: | 0/3 EV |
| Flash: | Flash did not fire |
| Orientation: | Horizontal (normal) |
| X-Resolution: | 72 dpi |
| Y-Resolution: | 72 dpi |
| Software: | Adobe Photoshop CS3 Windows |
| Date and Time: | 2008:03:13 22:44:47 |
| YCbCr Positioning: | Co-Sited |
| Exposure Program: | Normal |
| Date and Time (Original): | 2008:03:13 22:22:48 |
| Date and Time (Digitized): | 2008:03:13 22:22:48 |
| Shutter Speed: | 369876/65536 |
| Metering Mode: | Pattern |
| Color Space: | sRGB |
| Focal Plane X-Resolution: | 2207.526 dpi |
| Focal Plane Y-Resolution: | 2213.058 dpi |
| White Balance: | Manual |
| Compression: | JPEG |
| Image Width: | 1288 pixels |
| Image Height: | 1936 pixels |
Be good,
-Dave
|


6:41 PM by
El Dave
, under

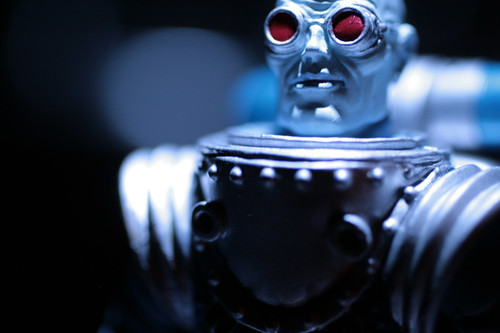
Every once in a while, I get tired of all the Photoshop, fog machines and small, barely controlled fires and want to reassure myself that I can still take a decent photo without jumping through all the hoops. This isn't exactly a portfolio piece, but it's still nice to know the basics haven't been completely forgotten.
Freeze was shot in a completely dark lightbox (I know, how ironic) with just a small LED flashlight a few inches over his head. When you're doing a portrait like this, try and remember not to just stand the figure in the center of the shot and press the shutter. The idea is to capture something interesting, and we all know what Mr. Freeze looks like, so why not play around with angles and tighter zooms? Instead of framing the shot to include his head, I used his goggles for the top and the rivets on his chestpiece for the bottom. I offset him just a little to the right, because dead center is an easy way to break up an otherwise dull photo.
Since I didn't do anything fun to this one, I bet it'll make it to Explore on Flickr ;)
The frosty EXIF of your doom!
| Camera: | Canon EOS Digital Rebel XTi |
| Exposure: | 2 sec (2) |
| Aperture: | f/2.5 |
| Focal Length: | 50 mm |
| ISO Speed: | 400 |
| Exposure Bias: | 0/3 EV |
| Flash: | Flash did not fire |
| Orientation: | Horizontal (normal) |
| X-Resolution: | 72 dpi |
| Y-Resolution: | 72 dpi |
| Software: | Adobe Photoshop CS3 Windows |
| Date and Time: | 2008:03:13 20:23:08 |
| YCbCr Positioning: | Co-Sited |
| Exposure Program: | Normal |
| Date and Time (Original): | 2008:03:13 20:07:51 |
| Date and Time (Digitized): | 2008:03:13 20:07:51 |
| Shutter Speed: | -65535/65536 |
| Metering Mode: | Pattern |
| Color Space: | sRGB |
| Focal Plane X-Resolution: | 2207.526 dpi |
| Focal Plane Y-Resolution: | 2213.058 dpi |
| White Balance: | Manual |
| Compression: | JPEG |
| Image Width: | 1936 pixels |
| Image Height: | 1288 pixels |
Be good,
-Dave
|


11:55 AM by
El Dave
, under

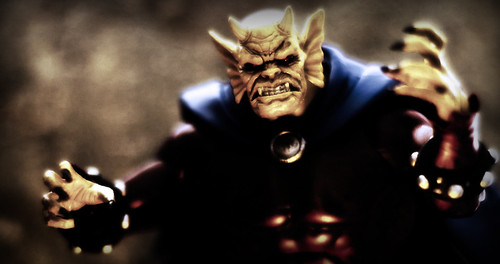
Another experiment with HDR, without actually taking an HDR photo. One of the things I like about High Dynamic Range is how easy it is to create striking images that jump right off the screen. Of course the artist has to decide if they want the effect to be subtle or go buck wild.
Clearly, I live buck wild.
The effect isn't that hard to do. In fact, Photoshop has a command called "Merge to HDR". Otherwise you're stuck creating multiple layers with varying brights and darks (like I did) and fight with the blending layers to get it the way you want it (like I did).
Just play around with it, and if you get stuck, do a quick Google search for "HDR Tutorial" and it will help you out.
File, Export, Merge to EXIF:
| Camera: | Fujifilm FinePixS2Pro |
| Exposure: | 0.1 sec (1/10) |
| Aperture: | f/1.8 |
| Focal Length: | 50 mm |
| ISO Speed: | 100 |
| Exposure Bias: | 0/100 EV |
| Orientation: | Horizontal (normal) |
| X-Resolution: | 72 dpi |
| Y-Resolution: | 72 dpi |
| Software: | Adobe Photoshop CS3 Windows |
| Date and Time: | 2008:02:09 10:51:40 |
| Timezone Offset: | -6, -6 |
| Exposure Program: | Manual |
| Date and Time (Original): | 2008:02:09 09:45:27 |
| Date and Time (Digitized): | 2008:02:09 09:45:27 |
| Shutter Speed: | 3321928/1000000 |
| Brightness: | 83/100 |
| Metering Mode: | Center Weighted Average |
| Light Source: | Daylight |
| Color Space: | Uncalibrated |
| Focal Plane X-Resolution: | 630 dpc |
| Focal Plane Y-Resolution: | 630 dpc |
| Sensing Method: | One-chip colour area sensor |
| Exposure Mode: | Manual |
| White Balance: | Manual |
| Focal Length In 35mm Film: | 75 |
| Saturation: | High saturation |
| Compression: | JPEG |
| Image Width: | 1965 pixels |
| Image Height: | 1038 pixels |
Be good,
-Dave
|


6:59 PM by
El Dave
, under

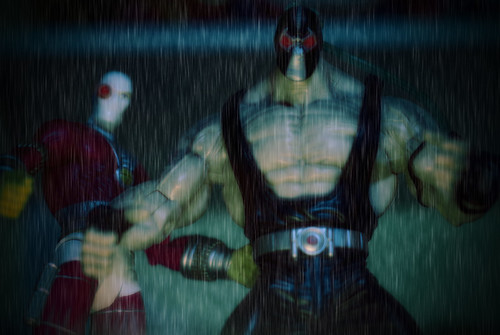
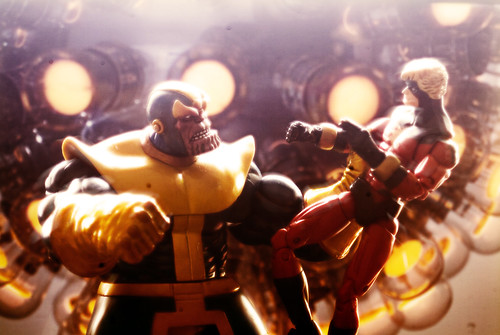
While this may not be exactly how the story goes, things certainly look grim for the good Captain.
(Sorry for the short post today. Gotta catch my train!)
Today's shot was a lesson in how to deal with a funky exposure. Just like the Lotus Warrior, I had a little trouble getting the light balanced. This time I wasn't able to get into the (normally dark) kitchen due to dinner being prepared. Laptop + Hot Stove/Food = Trouble for Dave. So what I did was bring the laptop and figures out into the living room and, figuring "what's the worst that can happen", set up in front of our windows. The natural light lit the figures beautifully, but threw that glare over the top of the monitor that I figured would completely wreck the shot.
Thankfully my good friend Photoshop was there to help me in my time of need. I couldn't remove the harsh glare, but I used it to my advantage with the help of a gradient layer. An orange/purple gradient brought down the harsh colors at the top while giving the bottom a warm glow.
Give them a try. You wont be disappointed!
Also... Note to self: CLEAN YOUR DANG LENSES.
My God...it's full of EXIF...
| Camera: | Fujifilm FinePixS2Pro |
| Exposure: | 0.067 sec (1/15) |
| Aperture: | f/5.6 |
| Focal Length: | 100 mm |
| ISO Speed: | 100 |
| Exposure Bias: | 0/100 EV |
| Orientation: | Horizontal (normal) |
| X-Resolution: | 72 dpi |
| Y-Resolution: | 72 dpi |
| Software: | Adobe Photoshop CS3 Windows |
| Date and Time: | 2008:03:05 14:26:07 |
| Timezone Offset: | -6, -6 |
| Exposure Program: | Normal |
| Date and Time (Original): | 2008:03:05 14:07:14 |
| Date and Time (Digitized): | 2008:03:05 14:07:14 |
| Shutter Speed: | 3906891/1000000 |
| Brightness: | 383/100 |
| Metering Mode: | Center Weighted Average |
| Light Source: | Daylight |
| Color Space: | Uncalibrated |
| Focal Plane X-Resolution: | 630 dpc |
| Focal Plane Y-Resolution: | 630 dpc |
| Sensing Method: | One-chip colour area sensor |
| White Balance: | Manual |
| Focal Length In 35mm Film: | 150 |
| Saturation: | High saturation |
| Compression: | JPEG |
| Image Width: | 3024 pixels |
| Image Height: |
|
Be good,
-Dave
|


4:55 PM by
El Dave
, under

I'm really enjoying using my laptop as a backdrop. Not only is it faster than building a background from scratch, it pulls double duty as a light source. The light it puts out isn't overwhelming though, so you will still need lamps (or candles, or flashlights, etc).
The background is a photo I took inside the Milwaukee Museum of Art. I'm always on the lookout for interesting textures and scenes, and the Museum has both in spades. I ended up with several shots that will make great backgrounds! Once the weather gets above freezing here in Chicago, I can't wait to get out and grab as many urban shots as I can.
Setup for these laptop shots couldn't be simpler. Just bring your intended backdrop up in Fullscreen, make sure your monitor is straight, set up your lights (making sure none of them are pointed directly at the screen), then snap away. All that's left is some color tweaking in Photoshop to help tie it all together.
Drop it like it's EXIF, baby.
| Camera: | Fujifilm FinePixS2Pro |
| Exposure: | 0.333 sec (1/3) |
| Aperture: | f/5.3 |
| Focal Length: | 74 mm |
| ISO Speed: | 100 |
| Exposure Bias: | 0/100 EV |
| Orientation: | Horizontal (normal) |
| X-Resolution: | 72 dpi |
| Y-Resolution: | 72 dpi |
| Software: | Adobe Photoshop CS3 Windows |
| Date and Time: | 2008:03:04 18:51:03 |
| Timezone Offset: | -6, -6 |
| Exposure Program: | Manual |
| Date and Time (Original): | 2008:03:04 18:35:03 |
| Date and Time (Digitized): | 2008:03:04 18:35:03 |
| Shutter Speed: | 1584963/1000000 |
| Brightness: | 266/100 |
| Metering Mode: | Center Weighted Average |
| Light Source: | Daylight |
| Color Space: | Uncalibrated |
| Focal Plane X-Resolution: | 630 dpc |
| Focal Plane Y-Resolution: | 630 dpc |
| Sensing Method: | One-chip colour area sensor |
| Exposure Mode: | Manual |
| White Balance: | Manual |
| Focal Length In 35mm Film: | 111 |
| Saturation: | High saturation |
| Compression: | JPEG |
| Image Width: | 1488 pixels |
| Image Height: | 2024 pixels |
Be good,
-Dave
|


