I've had a few people ask how I do the eye glow on my robots, so I thought it would be fun to do a tutorial and share it with you guys. For this we're gonna need 2 things, a picture of a robot and Photoshop. Wall-E? Check. Photoshop? Check.
(click on the pictures to see a larger version)
Step 1) Open your photo and make any Levels or Curves tweaks you need. I left both of those alone for this one.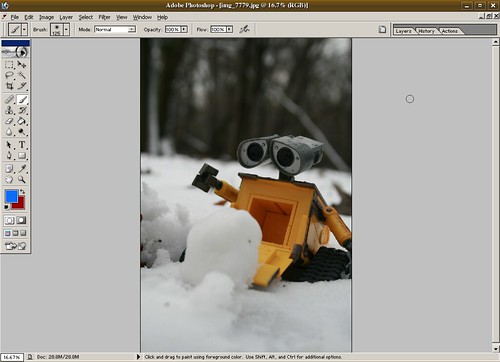
Step 2) OPTIONAL Apply the Lab Coloring that I talked about here. I set the second layer to Soft Light and changed the Opacity to 30%. Because I'm using it so much, I've recorded the Lab Coloring as an Action, so all I have to do is Open the image, click on Actions, then push Play. Like I said, this step is completely optional, but I want to show my work (wouldn't my algebra teachers be proud...).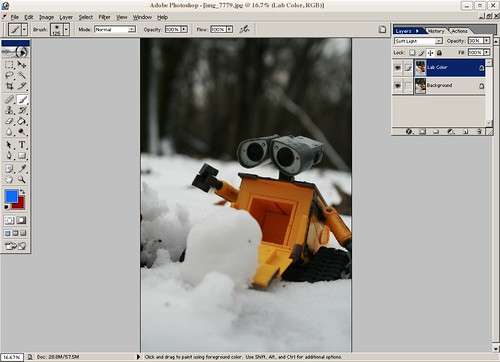
Step 3) Create a new Layer between the two existing Layers and call it Eye Glow. Select a soft edged paint brush and decide what color you want the eyes to be.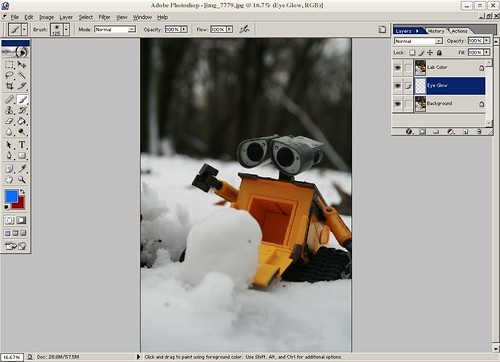
Step 4) Pick two shades of whatever color you chose for the eyes. Since Wall-E has blue eyes, I picked a dark blue and a brighter, almost turquoise. Paint the dark color first, using a brush just smaller than the area you're trying to fill.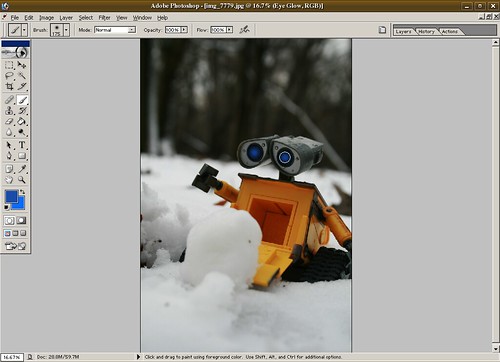
Step 5) Switch to your highlight color and shrink your brush (using the [ key) two or three times, depending on how intense you want the color to be. The smaller the brush, the brighter. Dot your eyes.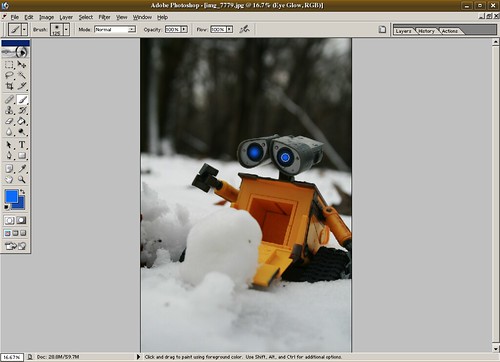
Step 6) Now we add depth. Using our Lab Color layer, we create a layer mask and, with a soft edge brush just smaller than we used for the dark part of the eye, dot the mask where the eye glow is. What this will do is cut a hole through the Lab Color layer, allowing the glow to shine through and create the illusion of depth, because the Eye Glow is behind the top layer.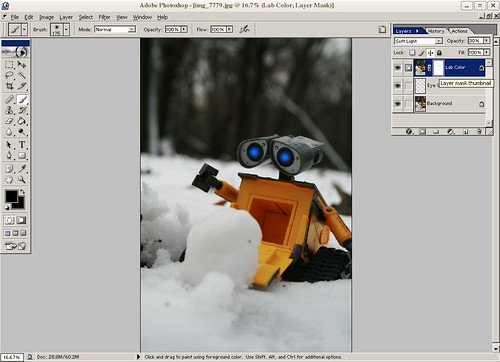
If you didn't create a Lab Color layer, have no fear. Simply duplicate your Background Layer and use it in the place of the Lab Color. When you're all finished, just flatten the image, do a quick Save As, and there you go! One quick and simple robot with glowing eyes.
What do you think, Wall-E?
"Whoa"
Waste Allocation Load Lifter-EXIF Class
| Camera: | Canon EOS Digital Rebel XTi |
| Exposure: | 0.001 sec (1/800) |
| Aperture: | f/5.6 |
| Focal Length: | 35 mm |
| ISO Speed: | 400 |
| Exposure Bias: | 0/3 EV |
| Flash: | Flash did not fire |
| Orientation: | Horizontal (normal) |
| X-Resolution: | 72 dpi |
| Y-Resolution: | 72 dpi |
| Software: | Adobe Photoshop 7.0 |
| Date and Time: | 2008:12:03 12:38:45 |
| YCbCr Positioning: | Co-Sited |
| Exposure Program: | Aperture priority |
| Date and Time (Original): | 2008:12:03 12:43:05 |
| Date and Time (Digitized): | 2008:12:03 12:43:05 |
| Shutter Speed: | 632020/65536 |
| Metering Mode: | Pattern |
| Color Space: | Uncalibrated |
| Focal Plane X-Resolution: | 4433.295 dpi |
| Focal Plane Y-Resolution: | 4453.608 dpi |
| Compression: | JPEG |
| Image Width: | 2592 pixels |
| Image Height: | 3888 pixels |
Be good,
-Dave


1 Reply to "Wall-E Tutorial"
creativeapples on December 8, 2008 at 8:16 AM
Fabulous tutorial!
Leave a Comment